Monday, January 31, 2011

Let there be Light

This weekend we finally finished installing our backyard malibu lighting, with the addition of  LED lanterns lining the lake. What was meant to be a simple installation turned into, of course, multiple yard projects.

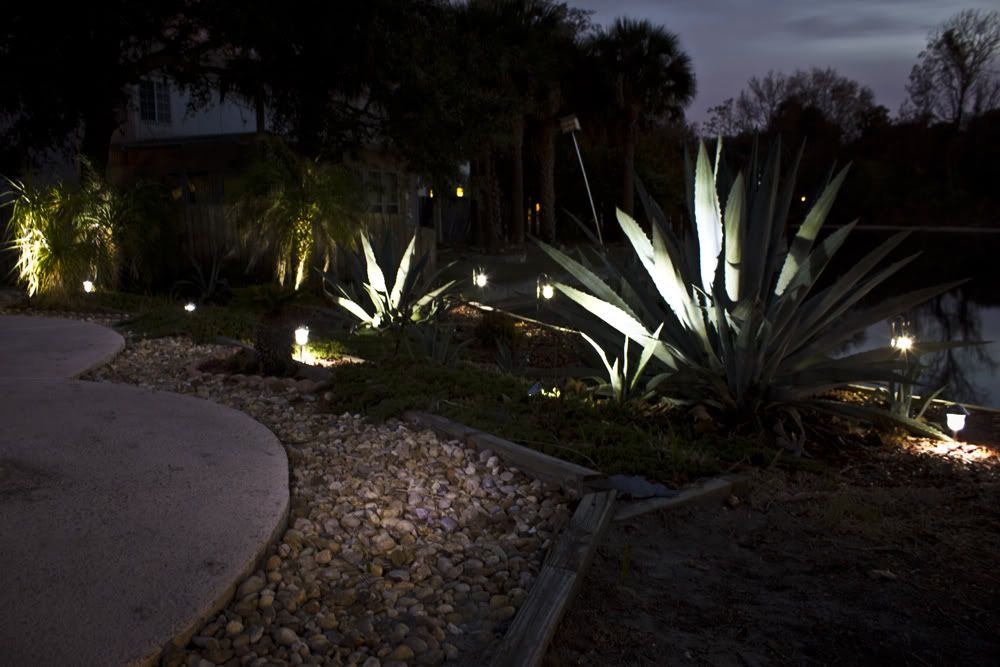
So here's how it went. We purchased this kit (which contained 6 lanterns and two spotlights), to add to our two existing kits that we have throughout the backyard (for a total of 12 malibu lights, 6 spotlights, and 6 lanterns).

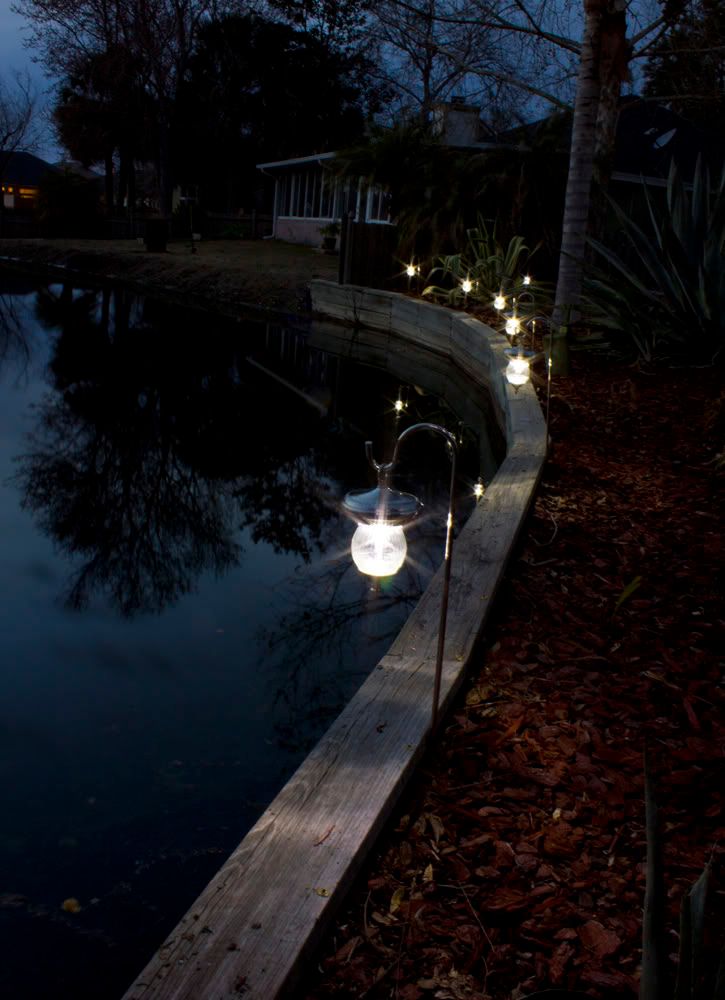
Here's the malibu lights we installed a couple months back:


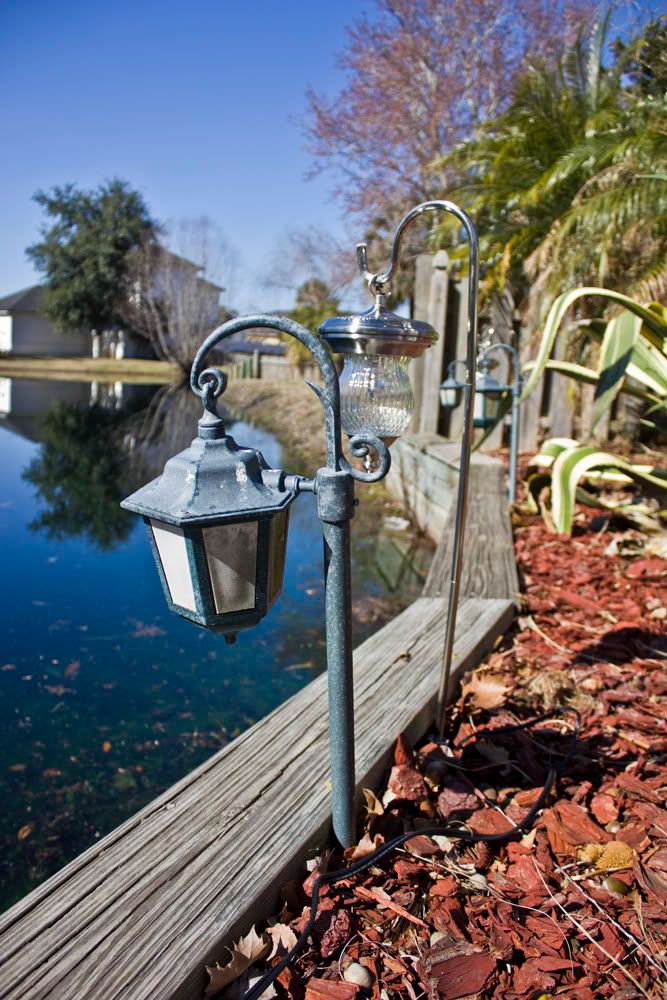
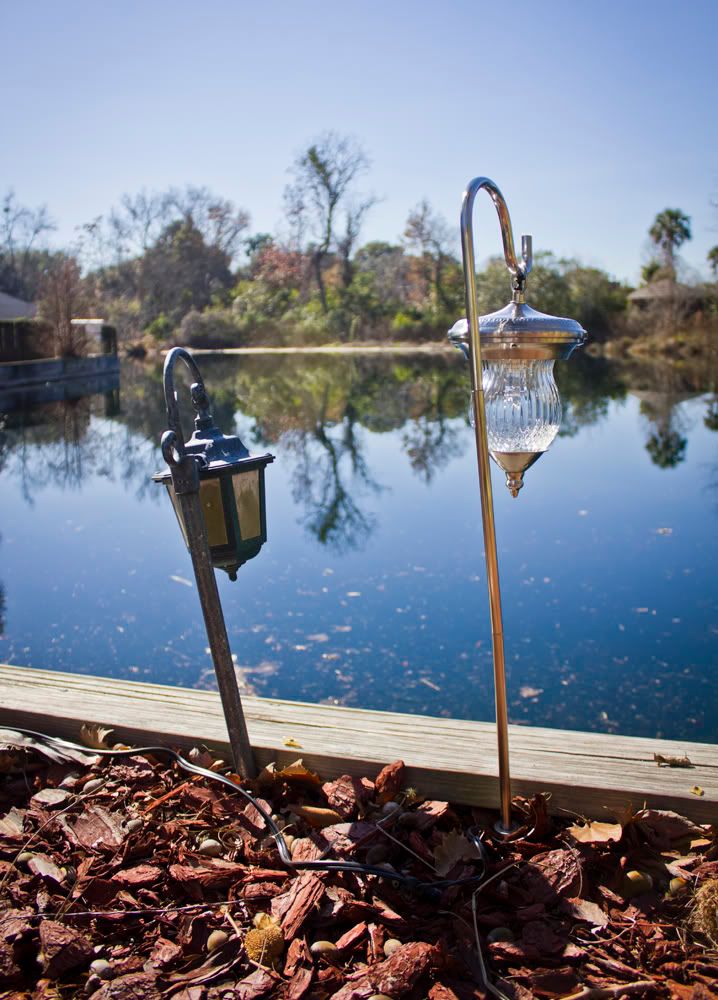
The previous owner already had lanterns, but they looked about 20 years old and weren't working. Here's a side by side of old vs new (old in green):


The installation was easy, but we couldn't help but notice all the trash and muck building up in our corner of the lake:


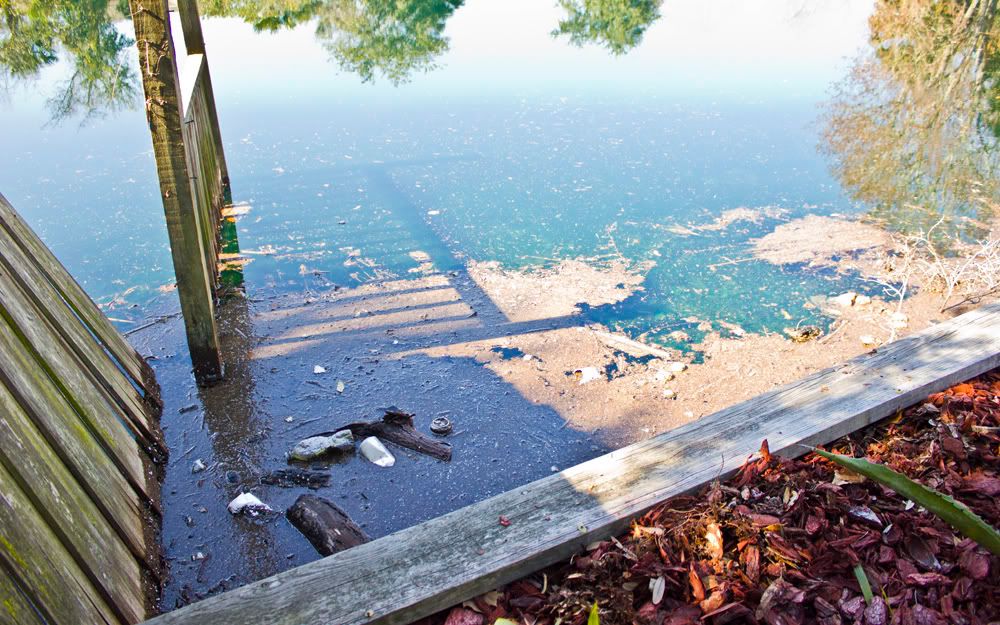
So we got some trash bags, shovels and pool nets and did our best to scrape it all out. Which helped a little, but all the dirt kept floating back to our corner.


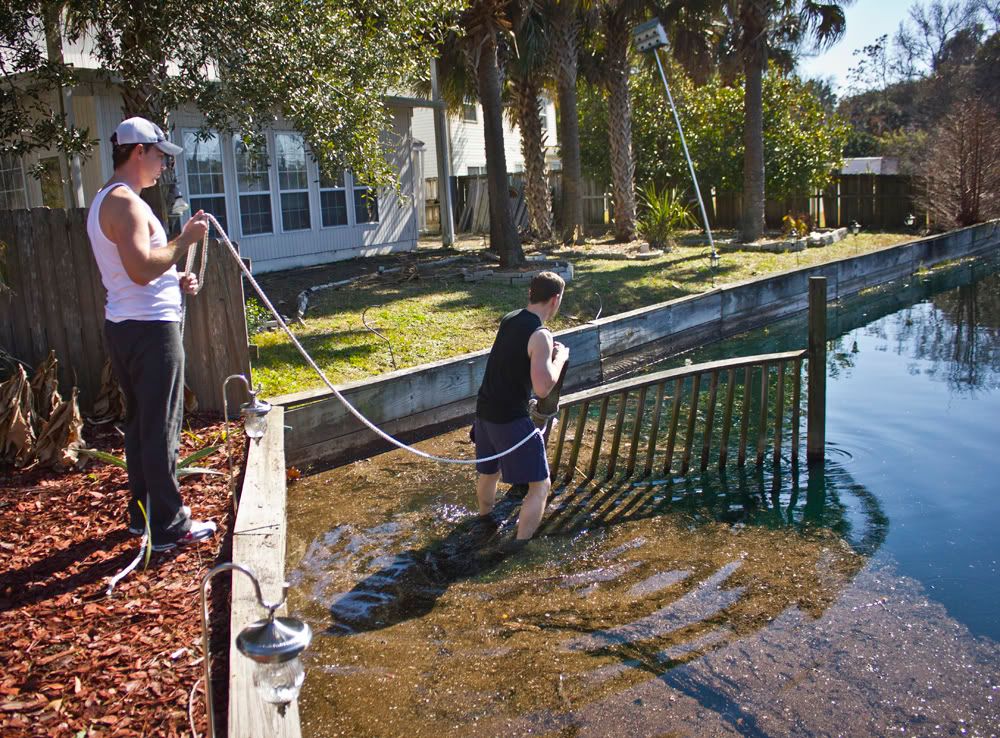
See those raggedy fences on the left side? We're not sure if those are ours or the neighbors, but we did not see the point in them (other than serving as trash magnets), so we decided they had to go.

The first fence was halfway hanging on anyway, so Brad was able to easily pull it out.


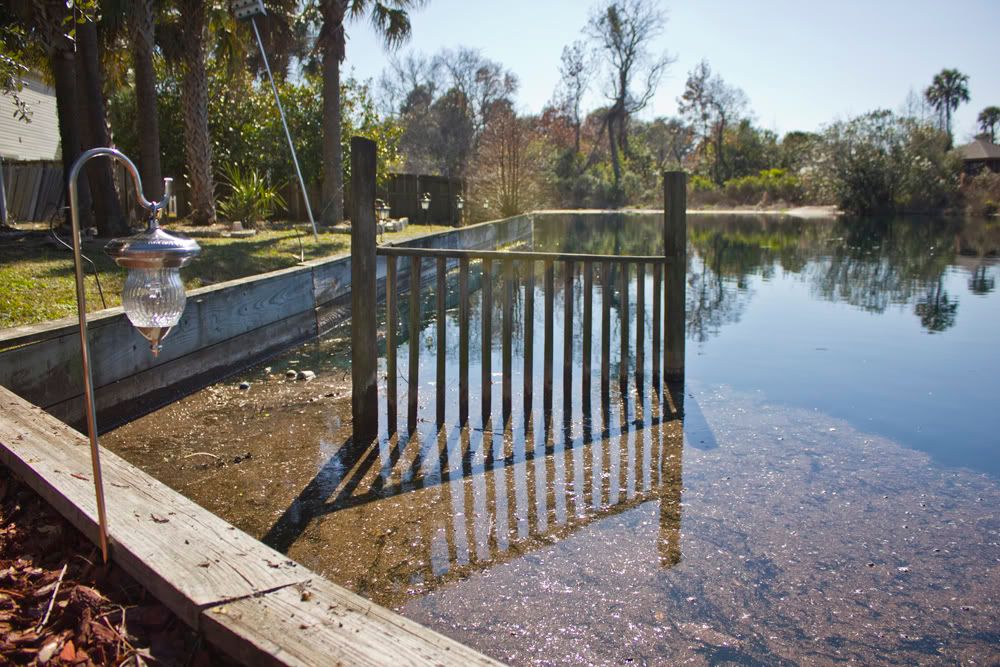
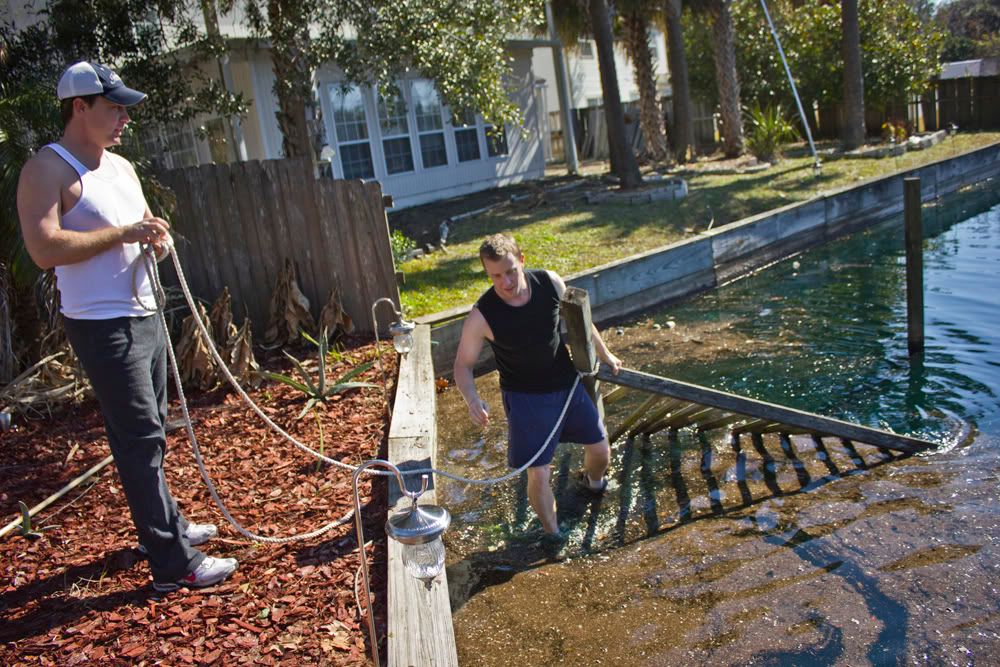
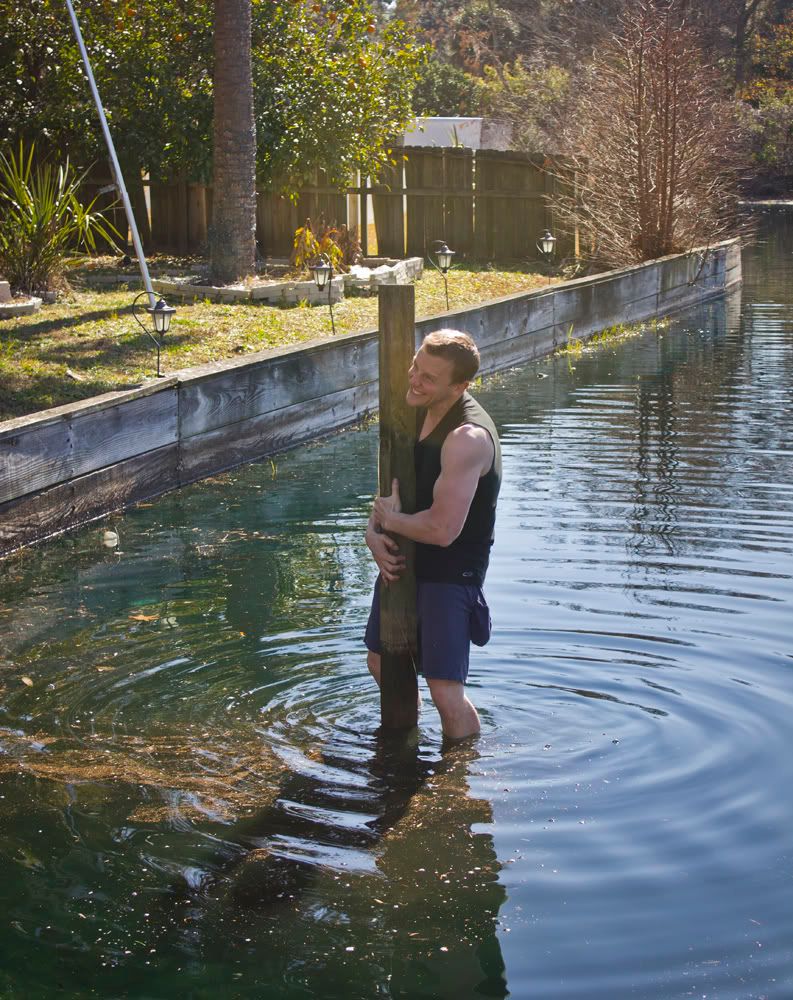
The second, however, was going to take a little more work. After a failed lasso attempt, Brad decided to jump in there (shoes and all) to rip the sucker out. Here's the picture play-by-play:


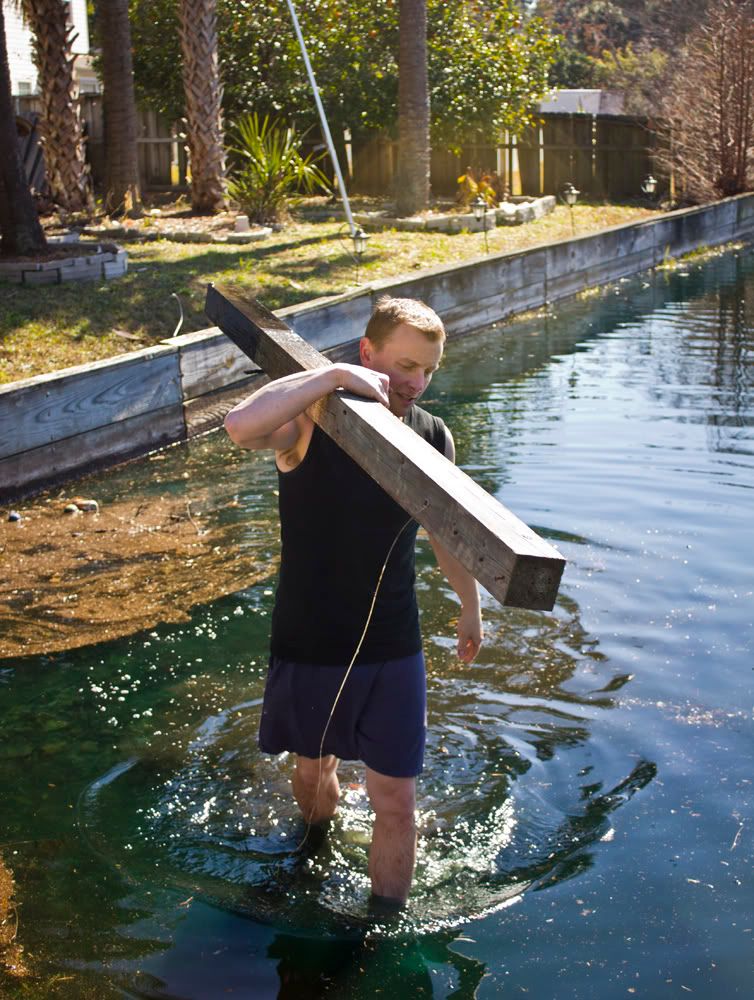
While he was in there, he finished trash duty and cleaned up the neighbor's share too. What a gentleman.


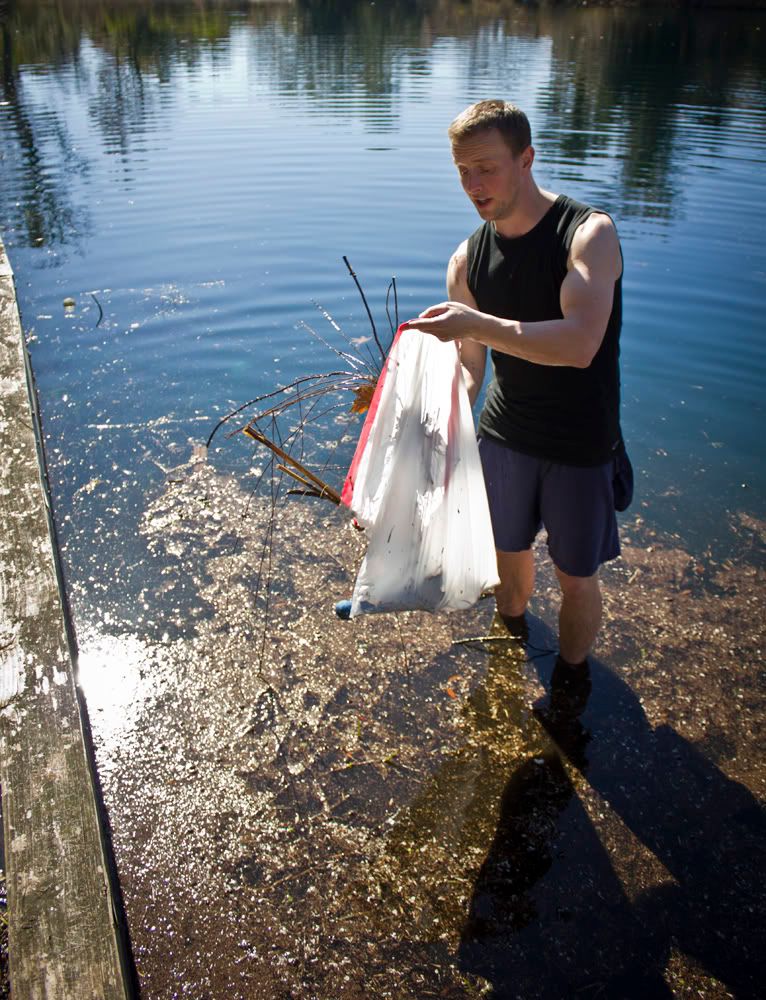
He brought a few souvenirs back on land... gross.


But it was all worth it for this nice unobstructed, trash free lake view...


 After all the dirty work was done, the lake junk magically dispersed and we had finally had sparkly clean water to match our sparkly new lanterns!


Then it was time for some pruning. Our giant palm tree had left us this little yard present:

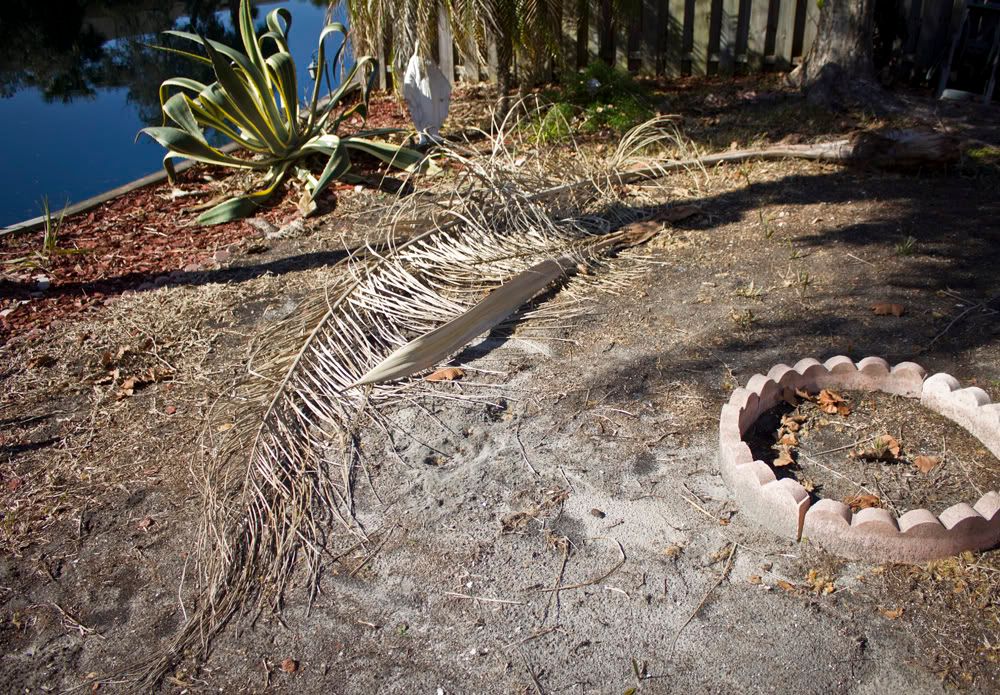
This dirt patch will be fixed soon, I promise!

As Brad disposed of that, I started collecting stray sticks, which had fallen from this lovely tree:


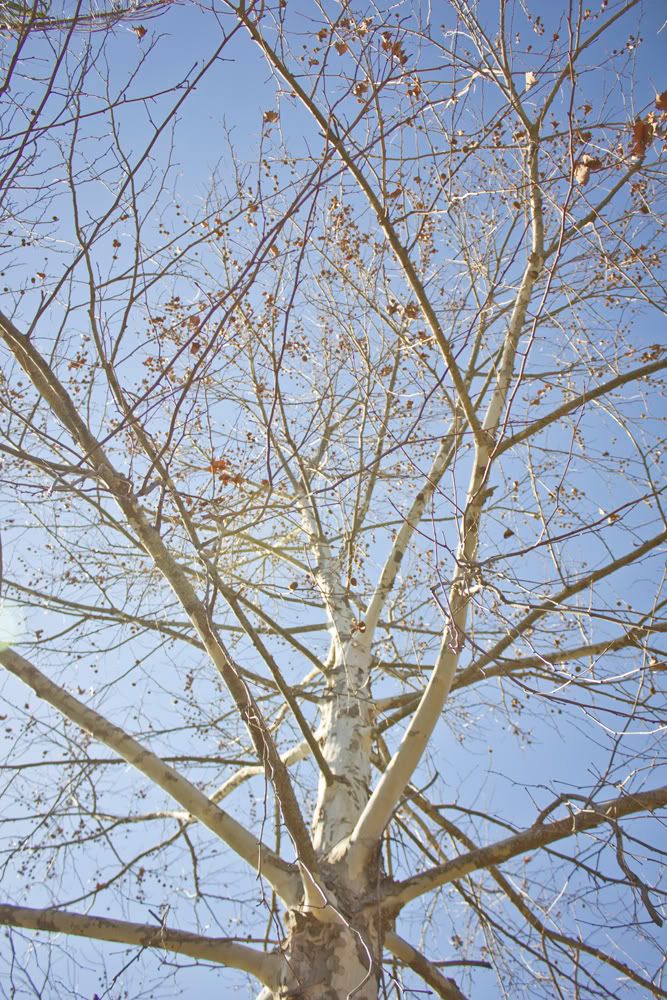
Recognize this pic? It's my new header!

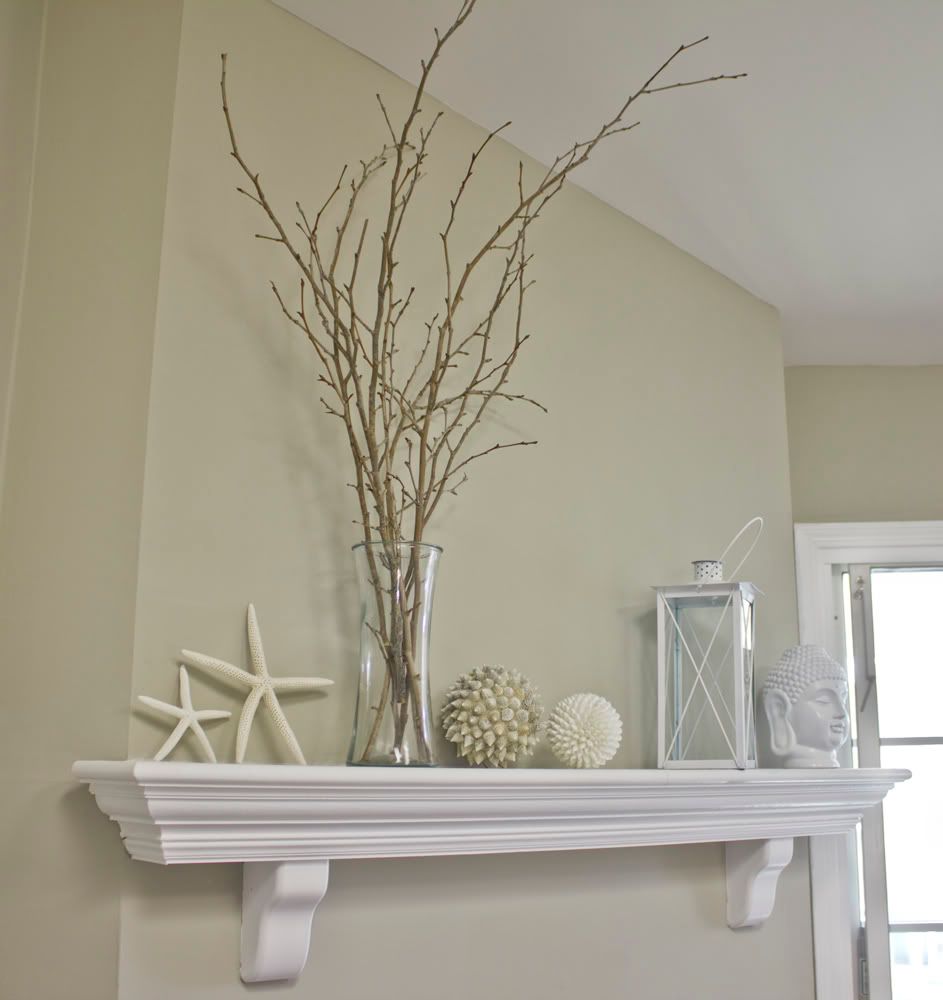
I have a borderline obsession for sticks, and I couldn't bear to see them trashed, so I decided to swap out the white sticks on the mantle for more of an au-naturale look. Since it was such a nice warm day outside, it seemed more fitting than all the stark winter white up there.


The following day, I was hearing strange noises from above while I was in the office painting. I walked outside to find this roof creature:


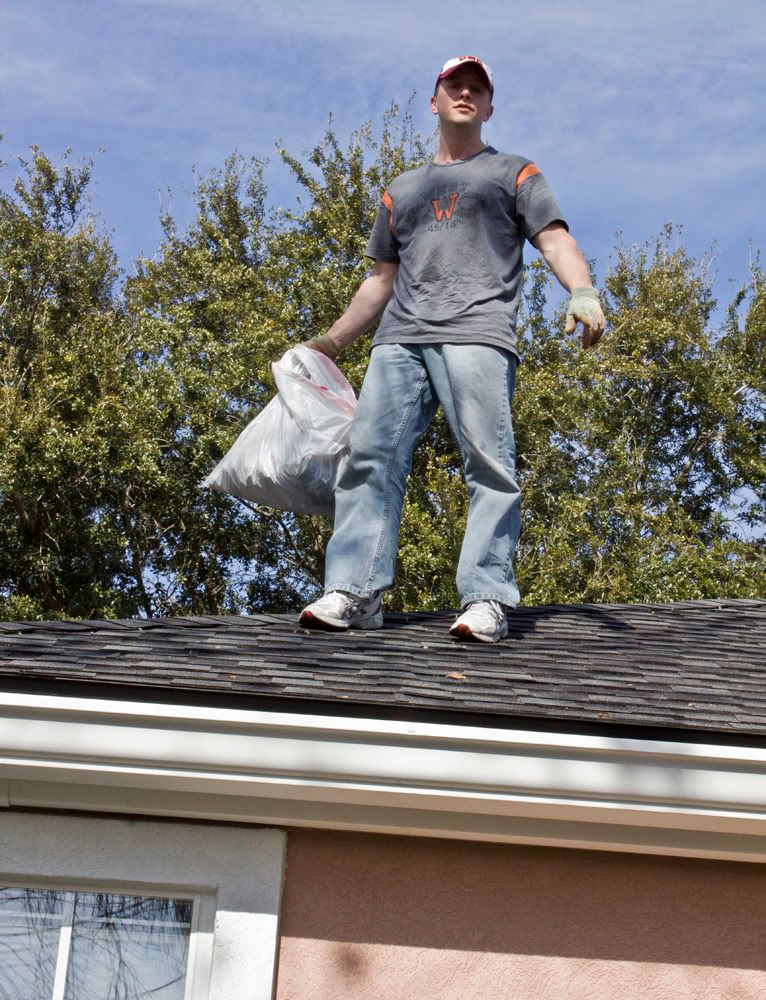
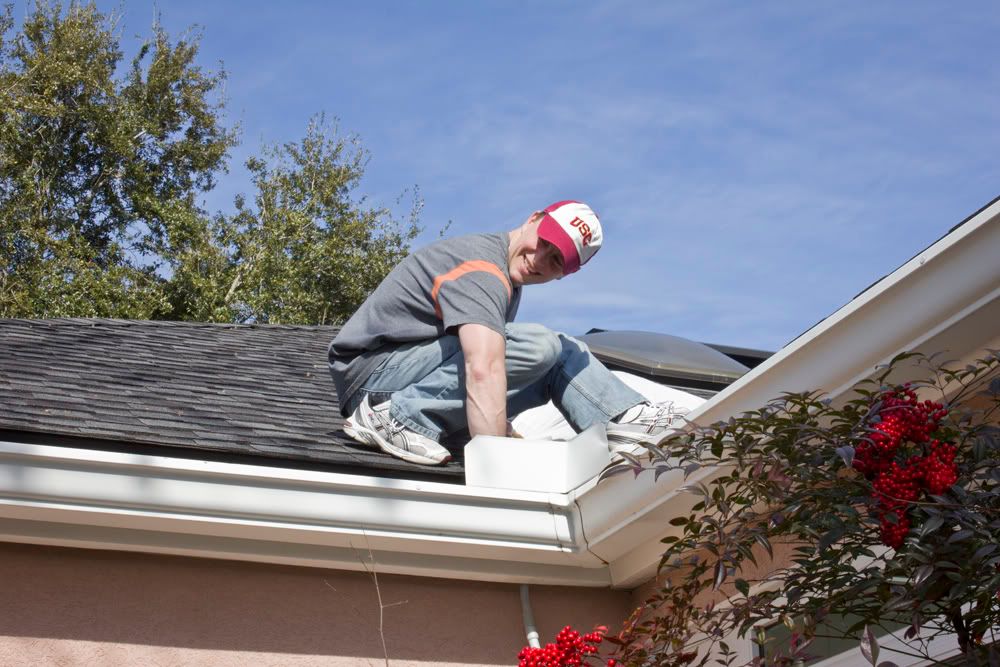
He was completing the long overdue task of cleaning out our gutters. We've had some heavy rains the past month and the leaves were overflowing. One less thing for us to worry about!

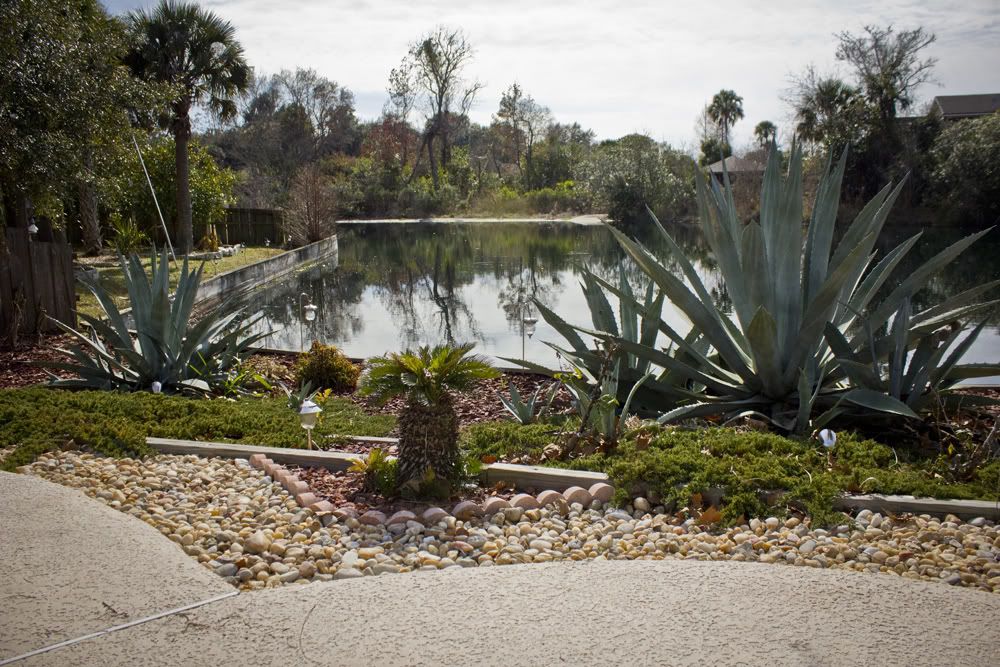
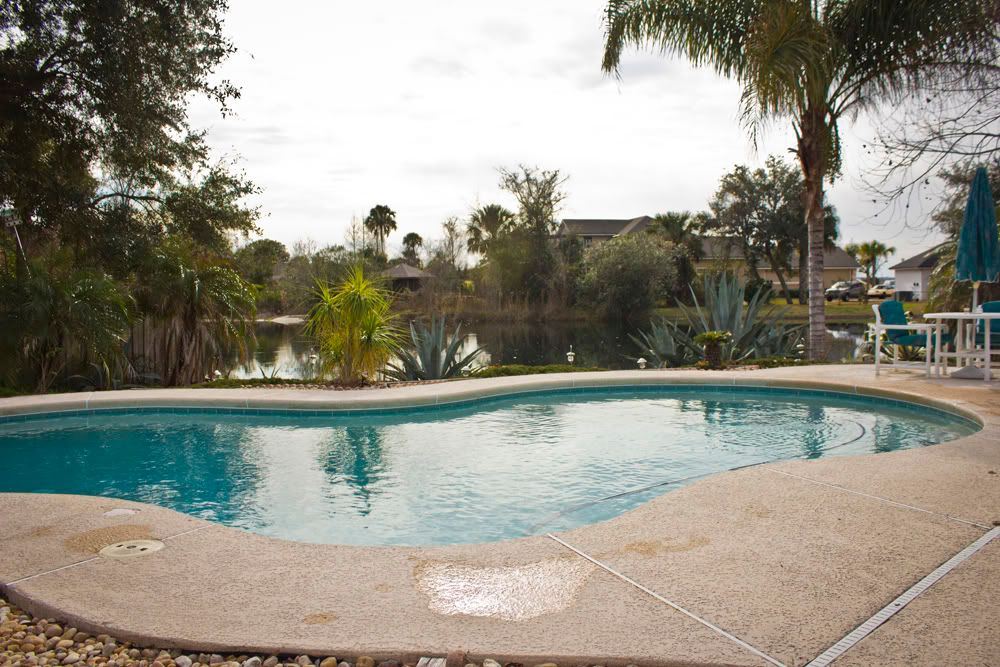
After laboring on the hot roof for over an hour, Brad decided he'd be the first to break-in the pool (no one's been in it since we've moved here). We decided to finally remove the net and clean it out (we had put it on last month after heavy winds and rains were blowing piles of leaves into the pool). By the time everything was spotless and ready to go, he had cooled down enough to realize that 50-some degree water wasn't such a great idea after all. But it wasn't for nothing... our backyard is finally presentable again:


Ahh yes... much better.

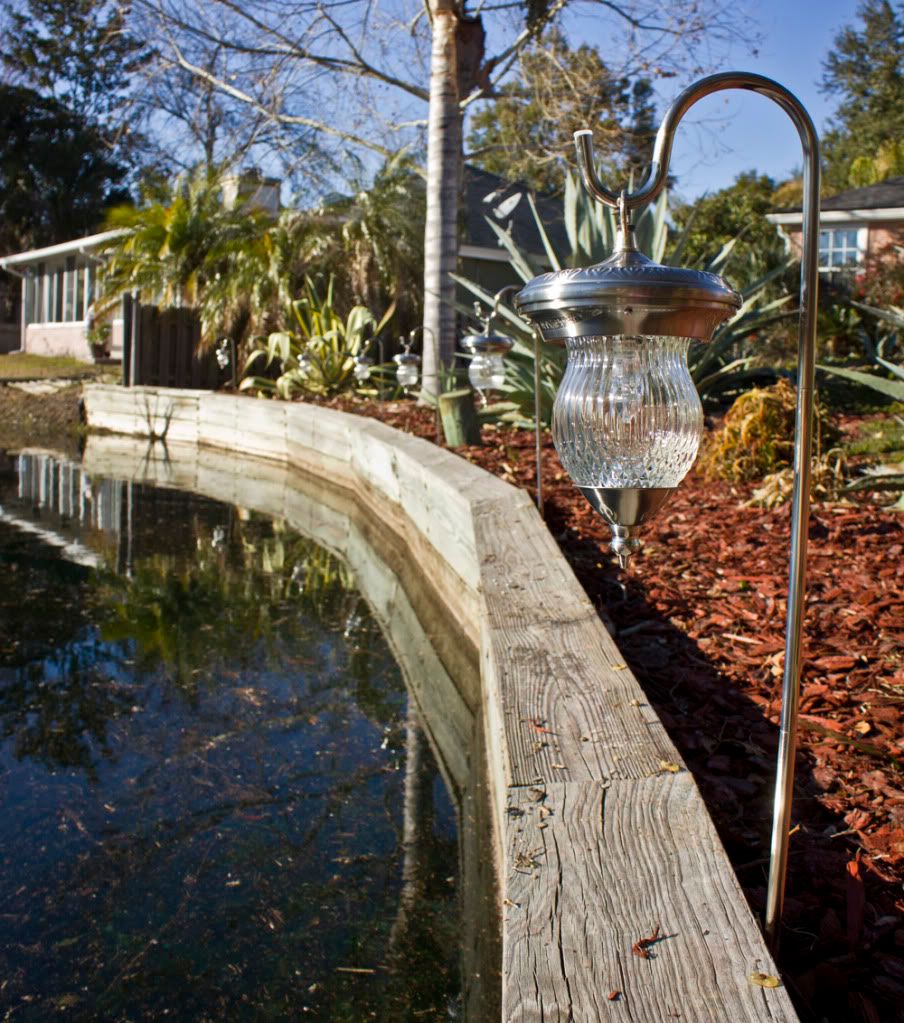
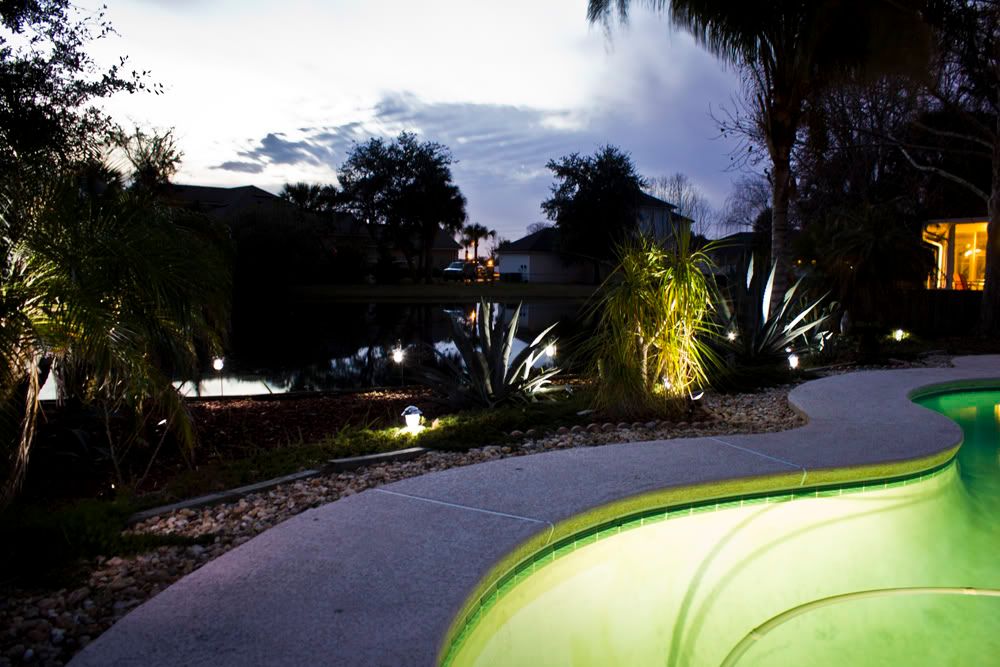
Last night I snapped a few pics of our lights and I'm loving the results!


While I didn't get everything done that I had planned, I'd say we had a productive weekend. I was also able to do some touch up painting and help get Brad's "Man Cave" a little closer to camera ready. More on that next post!


Saturday, January 29, 2011

Up on the Roof


After the roofs of a few local buildings collapsed under the weight of snow, I thought I should get up on the flat portion of my roof and check it out.  The flat roof is over the master bedroom and back porch and is accessed through a little door at the back of the attic.  I've only been up here once with The Architects.


There's about 2-1/2 feet of snow up here so I think it's good I got up here to deal with it.

And while I'm up here, I thought it would be fun to show the surrounding neighborhood from this bird's-eye view.


Looking north toward the front of the house, the steeple in the right of the photo is right in Central Square where I catch the subway to work.


Off the other side of the house, looking northeast, is my old maple tree and the two soapworker's cottages that are the two oldest houses on the street, built in 1835.  They're on the National Register of Historic Places.


This is a closer look at one of the cottages and my neighbor who is also clearing snow and ice from her roof.  


This is looking east toward Boston.  Through the tree...


...you can see the Prudential building.  This is about a block from the Boston Marathon's finish line.


This is looking south down the little alleyway where there are four more old cottages.


Finally, looking west are more houses and one of the many local churches.


I love this view but unfortunately the only place I can see it is from the attic.  It would be nice to have a roof deck or an attic hideaway one day to enjoy this scene.


Another storm coming on Wednesday.   And I'm ready.


Friday, January 28, 2011

What to expect...

Since there is so much to do with this house, and so many new ideas that are constantly popping into my head, I thought it might be helpful to organize my thoughts by creating a checklist of sorts for all the upcoming projects. Now, this list isn't set in stone, and will be evolving as I go along, but it's a pretty good idea of what I want our home to get to eventually. I'd like to complete the majority of it in 2011... because I'm impatient like that, and if something is not done it's all I can think about. As long as the finances and the husband agree, I think it can happen. We've already tackled the big stuff since moving in November (hardwood floors, scraped popcorn ceilings, lighting, paint, unpacking) now comes the "fun stuff". Oh yeah, Bring It On.

Here's what you can expect to see in this blog in the coming months:


Excuse the sloppy handwriting!

Whew, that will keep us me busy for a while. It's going to be a long road, but I think it will all pay off in the end. Thanks for coming along for the ride :)

Home | Ideas for Boys' Bedrooms | Children Bedroom Interior Design

Depending on the day, minute, hour or week, I'm always doing something different (as you may have noticed from my  blog entries!)... cooking, diy home projects, event design, etc.  Well today, I'm interior decorating.  

This is a new section of my business that I'm very excited about - home interior design.  My first client has asked me to help her with her two sons' bedrooms.  After seeing photos of the two rooms, photos of the rest of her house, and talking with her about her vision, I've created the following design concepts. 

CONCEPT 1 : Ralph Lauren
I've prepared two versions of each concept - one for each room.  So, the theme is the same, but executed differently in each room.
Ralph Lauren 1 : This room took its inspiration from the Polo's darling children's line.  The bedding will be similar to the classic light blue oxford shirt, layered with plaids (white sheets, of course).  I'd use oatmeal linen throughout the room as the neutralizer amongst all of the color... drapes, throw pillows, etc.  The walls will be a deep, grey-blue.  I think the brass light fixtures and nail head trim on the grey wool chair are very Ralph Lauren.  I like the addition of vintage artwork to the traditional decor. 
Ralph Lauren 2 : Again, I'd use the classic light blue oxford shirt as bedding, but this time the walls are a creamy neutral.  This room will be more heavily accented in the red/brown plaid with touches of navy and grey wool.

....................

CONCEPT 2 : Handsome
 Handsome 1 : The walls in this room are going to be a warm grey (restoration hardware).  I'd use soft plaids of creams, browns and touches of light blue and green.  The artwork has gone to the dogs... a vintage sketch and modern dog light.  The room will feel light because of the oatmeal linen drapes, but cozy from the layering of fabrics.
Handsome 2 : Using the same concept as above, this room will be soft neutrals with accents of light blue and navy.  The brown chair with nail head trim will wear beautifully with heavy use.  More dog artwork and nautical sketches.

.....................
Would you like me to help you with your design projects?  Email jenny@occasionskc.com for more information!

Thursday, January 27, 2011

Valentine's Day Sugar Cookies | Heart Sugar Cookies | Recipe


With an adorable Valentine's Sugar Cookie like these, they really need to be the star of your gift.  So, I chose simple, clean ways to present them as gifts.  The supplies can be easily found and is inexpensive.

Cellophane Bags : The quintessential food packaging go-to.  I included three various sizes of the cookies and tied them with natural twine.

Tip : I like the 'crunchy' cellophane bags.  You know what I'm talking about if you've ever used them.  They are not soft plastic, they are stiff.  They look much more professional than the soft plastic bags.


I love packaging goodies in glassine bags - they leave a little bit of mystery.  I found these glassine envelopes at JoAnn's.  In the past, I've also found them at Hobby Lobby, Paper-Source and Micheal's.  I used a fine point black Sharpie for the message.  


To get my sugar cookie recipe and tips for decorating, click here. 


Valentine's Day Cupcakes & Flowers - Get the step-by-step directions here!


Valentine's Day DIY Flowers - Get the step-by-step directions here!


Valentine's Day Boxed Cupcakes - Get the step-by-step directions here!

Before and After (The Storm)


Remember this just before Christmas?


This is what it looks like this morning.


These are the side steps off the front porch to the garden gate.


Just finished my morning workout.


And here's the garden.

It's actually pretty now that the sun is out.