Wednesday, September 28, 2011

Quick Computer Organization Tip

Does your desktop look like this?


I just discovered a new way to organize—wallpaper. No, not the kind you apply to your walls, but the kind that sits on your desktop.

Filing everything away into folders is one way to clear your desktop and keep your computer organized, but that won't always work for everyone. If you like to keep multiple icons on your desktop that you need to access a lot (and don't feel like clicking through 5 subdirectories to reach every time), this may help.

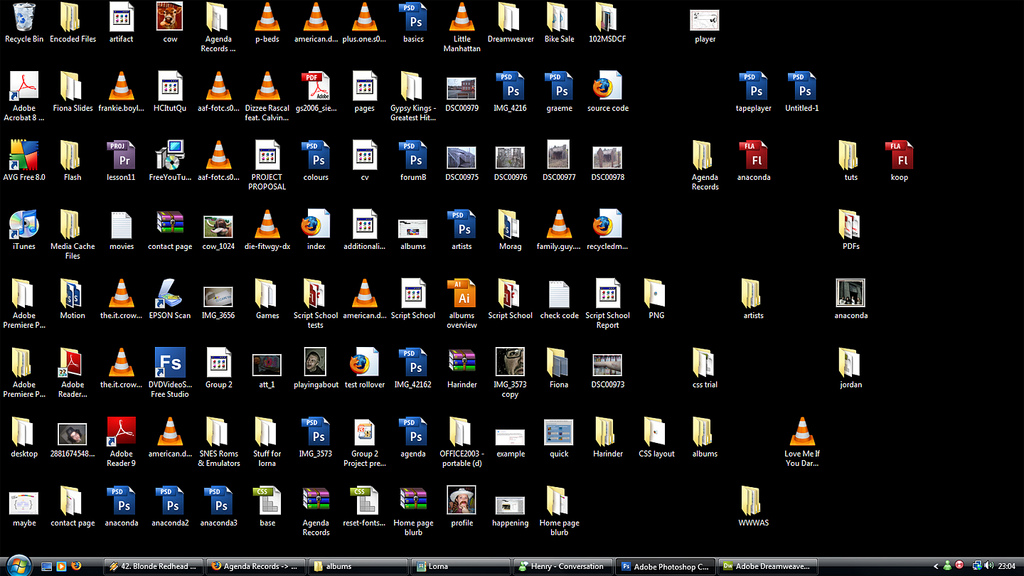
As many of you know by now, I run a business, so that means customer folders constantly being created and shifted around on my desktop. I normally just grouped them into different areas on my screen as they went through the process from purchase to print, so I could always "know" their status, but I wasn't completely satisfied with this method. Then—lightbulb moment—I decided to make my wallpaper useful and split the screen up into color coded areas, each representing a stage in the process.

Step 1 was to find the file size I needed to make, which will be your screen's resolution. In my case, its 1920x1080 pixels.


Then I took to illustrator to create the file. This was a process in trial and error... shifting things around and testing them out on the screen until everything was in a good spot.


That's all it took, and it works like a charm!


Now that the steps are clearly defined, I should feel more confident in my work process and know that everything is in its' place. This idea can be translated in so many different ways to fit everyone's individual needs. The possibilities are endless... really. Hopefully this can inspire someone else out there who is struggling with their desktop organization!


Pssst... I redesigned my "Projects" page to be more user-friendly and easily navigatable. Go check it out and tell me what you think!

Tuesday, September 27, 2011

Getting Ready


For most of this summer, I've been getting ready. 

Let me explain.  A few months back I got an e-mail from someone at a magazine saying that they looked in on my blog from time and time and asked if I would consider having my house photographed.  First, I never considered the possibility that magazines might be looking at our blogs. Second, I never thought for a second that my house was at a stage where "magazine" would even enter the same sentence.  And, finally, are you kidding me right now!?

This explains why the summer I was supposedly "taking off" was filled with project after project.   I've been getting ready.

Long story short, the e-mail was from someone at Meredith.com and they're shooting my house for a book entitled Better Homes and Gardens New Cottage Style.  It's an all-new edition of the very popular New Cottage Style released in 2005. 

Cover of 2005 Better Homes and Gardens New Cottage Style

The stylist for the shoot will be the amazing Stacy Kunstel.  I've been following her work for a while and I'm thrilled to have an opportunity to see her magic.  The photographer will be the incredibly talented Michael Partenio who shot Joan's house a few months back.  Be sure to check out Michael's portfolio.  You'll drool all over yourself.

The new book--I mean, MY new book--will be 192 pages of delicious cottage style and will coming out in June of 2012 and will be available in bookstores and online. 

I hope to take photos of the shoot in progress so you all can see them.  I've always wondered what goes on behind the scenes of these photo shoots and seeing it happen in my own house, is almost like a dream.  So, excuse me, I have more getting ready to do.

Monday, September 26, 2011

Duxbury Ma. | New England Day Trip | South Shore Boston Area


When I experience a perfect something or place that I can't quite describe, but I just get a certain feeling from it, I tend to provide a movie reference.  For me, a perfect house or neighborhood might be a "Father of the Bride" street, or a "Home Alone" house.


You know the type - winding, tree-lined streets with handsomely sized (vs. obnoxiously giant), well-kept homes (vs. overgrown).


The kind of neighborhoods where kids play in the yard and ride their bikes down the street. 


I always get warm fuzzies when I come across a neighborhood, town or street that has those indescribable little somethings.


Our latest encounter was in Duxbury, Ma. (also known as "Deluxe-bury") on a day trip down to the South Shore of the Boston area.  I read in an online guide that it is the J.Crew town of the South Shore... I know, how am I just now making the trip down there?


Mike and I loved the cozy little town and its winding streets.  There is no coincidence that those cozy, tree-lined streets lead to a stunning coastline beach.

   
Oh, yes, in my dream neighborhood the kids can ride their bikes down the street... to the beach.


A beach that is quiet and quaint, and never crowded.


And a sailboat ride is just a breeze away.

Transitioning from Summer to Fall


It's time to empty the summer planters to get them ready for fall.  The front faces northeast so it enjoys a few hours of early morning sun.  This year I tried a few Boston ferns for a simple bit of green at the front door.  I've never had luck with Boston ferns in the house but they thrived in the humidity outdoors.


I headed to the garden center thinking I'd get some burgundy mums but when I got there, I couldn't find the color I was looking for.  So I thought I try something a little different.


A grass, purple cabbage and a miniature purple petunia that will tolerate temperatures down to 30 degrees.


The grass is a perennial so as long as I get it in the ground before it freezes, it should be fine.  Under cover of the porch, I also think the petunias will last right up to Thanksgiving.


It's not your typical fall flower pots but I like them.


I'm linking up with Small but Charming's Flower Party.  Check it out here.

Sunday, September 25, 2011

Dining Room Table Makeover

You know how in grade school, you'd have arts and crafts time... and the teacher would play music in the background and just let you go crazy with your paint and glue and scissors and paper? And it was the best thing ever and you never wanted it to end? That's what this weekend was like for me. A good arts & crafts session. I pretty much loved every minute of it. Maybe because it's something I've been waiting so long for.

I've been searching for the perfect pedestal dining table to fill our dining nook for as long as I can remember. And I am thrilled to announce that the day has finally come. Our nook now has a purpose.

Last weekend, I was fortunate enough for someone to not only discover my dream table on Craigslist, but she offered to deliver it too (thanks Sara!). And everything about it was perfect. It was $100, which isn't a steal for Craigslist, but it had everything I was looking for (plus 2 extension leaves) so I couldn't pass it up.


The first step was to decide what color to paint it. The obvious solution for me is usually white, but the table is going against a background of white wainscoting and that is just too much white on white. So my next thought was to bring a little color into the space with turquoise.

I still had some paint leftover from this chest:


Since the dining table would only be a few yards away from it, I thought it would be a good way to tie everything together. I didn't want it to match exactly, so I mixed in some white to give it a barely-there-blue shade.

Now for the transformation.

First, I lightly sanded to remove any surface dirt.


Then I applied a coat of oil based Zinsser primer.


After drying, I applied another coat.


At this point, you could still see some of the wood showing through, but the primer layers were becoming quite thick and I wasn't convinced it was necessary to completely coat the surface before painting (I could have been wrong... but I think I was right). So I moved onto to the next step.


Here's my custom mixed pale blue shade, ready to go.

And here is after one coat...


And after two...


Two coats was all it took, and then it just had to dry.

I had debated on whether or not to distress this piece, but after seeing the quality and texture of it in person, I decided it would be a good fit. There were natural grooves and holes and crevices in the wood, so even if I tried to make it as smooth and polished as possible, it just wouldn't ever have that perfect store-bought modern look. So I went with it.


Finally, I applied a few coats of Minwax's Polycrylic to seal and protect the surface.

And here's the table in its new home:


I just can't get over this shade... I'm in love!

I would have completed the room this weekend with chairs and a table setting, but that's a project all on its own. I've got plans for the accessories that will take a whole weekend to complete, if everything goes right *fingers crossed*

Here's a little preview of what I have to work with....


Yep... good old Ikea chairs. As you can see, they do not match the space at all. But that will change next weekend. See you then :)


Friday, September 23, 2011

Banana Nut Muffins | Homemade Banana Nut Muffin Recipe


Muffins are completely underrated.  Or should I say, homemade, really good muffins are completely underrated.  My muffin perspective had been tainted by the bad muffins I would grab at the coffee shop or the airport.  These muffins, baked weeks (or months!) ago are too sweet, too dense, too greasy and too heavy.  They made me forget how incredibly moist, buttery and delicious a fresh, baked-from-scratch muffin can be.

Treat yourself to a real treat tomorrow morning and whip up these muffins.  It won't take you more than 10 minutes to stir them together and 20 minutes to bake.  If you're really organized, you can make the batter the night before and bake them in the morning.  Your house will be brimming with the best Banana Nut aroma as it bakes - the smell is almost as good as eating the actual muffins... a great way to wake up.

I suggest making these muffins and your own "Pumpkin Spice" latte (recipe coming tomorrow!) on a Saturday morning - your house will feel cozier than the most charming coffee shop... and the muffins will be much better.


Banana Nut Muffins
better than the bakery...

New! Printable Recipes, here.

4 overripe bananas
1 cup sugar
3/4 cup unsalted butter, melted
2 large eggs
1 teaspoon pure vanilla extract
2 cups flour
1 1/2 teaspoons baking soda
1/2 teaspoon salt
1/2 cup nuts, finely chopped

Peel the bananas.  Mash them roughly with a fork - leaving some chunky pieces for texture.  Place half of them in a KitchenAid fitted with the whisk attachment.  Set aside the other half of the bananas.

Add sugar to the KitchenAid, whip them together for 3 minutes until a frothy mixture forms.  Add butter, eggs and vanilla.  Mix together until combined.  Add flour, soda, salt, remaining bananas and nuts.  Stir until just combined.  Do not over mix.

Scoop the mixture into a non-stick muffin tin (like this Golden-Touch Large Muffin Pan from Williams-Sonoma - it makes Big Muffins!) with an ice cream scoop (here are my favorite scoops).  Bake at 350 degrees for 18-20 minutes until baked through.  Serve with soften butter.


Can't you just taste them now - look at that melting butter!


I used mixed nuts, because that is what I had.  You can use any combination you like.


Mash the bananas with a fork - leaving it a little chunky for texture.


Whipped Banana Sugar mixture... yum.


Enjoy!

Thursday, September 22, 2011

Fall Home Decorations | Fallizing the House for Autumn | Home


In New England, we have had a heavy dose of Fall weather in the last two weeks - crisp 62 degree days, 45 degree nights.  It has inspired me to do some (as Katie would say...) "Fallizing." Here are a couple of snapshots of things I have done to "warm up" our home for the upcoming cool months.

By the way, looking at these photos I am now hating the 'slate' colored coffee table that I was debating about in the spring... it looks so blue with all of the fall accents.  Looks like the paint brush might be coming out - maybe a warmer grey?  Or how about an upholstered ottoman? 

And yes, I see that I left the tv on in the background - whoops.

  Here is a post of the 'before' photos from when we moved in in the spring.


Heirloom pumpkins by the fireplace.


Prints of Chestnuts and some other type of botanical...


Brown fur, velvet and embroidered pheasant pillows are added to what was all white linen before. 


Tiger stripe (go Tigers!) vintage book, matching gourds and a black labeled candle on the coffee table.


The light blue plates were replaced with my Woodland collection that goes along with my pewter.


The kitchen hutch is outfitted with a couple of select Fall elements.   A lot of my Everyday Essentials are featured on this hutch - click here to see the buying guide!


Tiger stripe plates... again, for Mizzou watching!


Pie Plate of mini white pumpkins...


Leaf mini plates and a plaid dish towel.

What are you doing to Fallize your home?  Photos of exterior Fallizing to come... waiting for those darn leaves to turn!